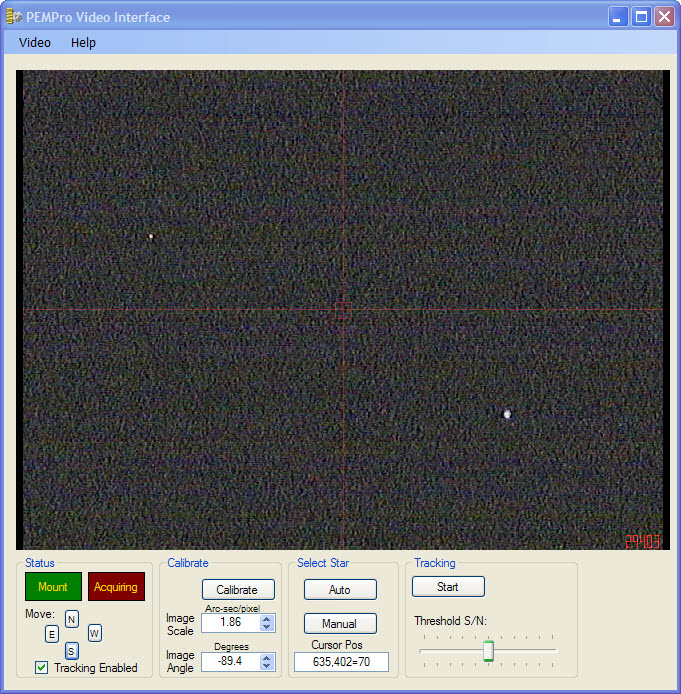
Video Interface
PEMPro V2 provides a way to use a low cost webcam or video camera to measure and adjust periodic error, polar alignment, and backlash.
NOTE: Starting with version 2.6 the Video Interface is no longer a separate application but is built directly into PEMPro. Thus, you no longer need to (or can) start the Video Interface application that was present in v2.5 and earlier. |
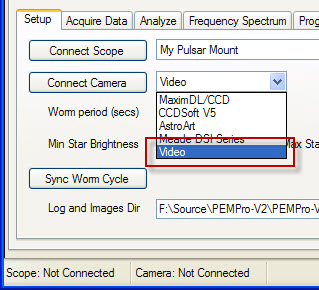
To use the video interface application select Video in the drop down list box shown below and click Connect Camera :
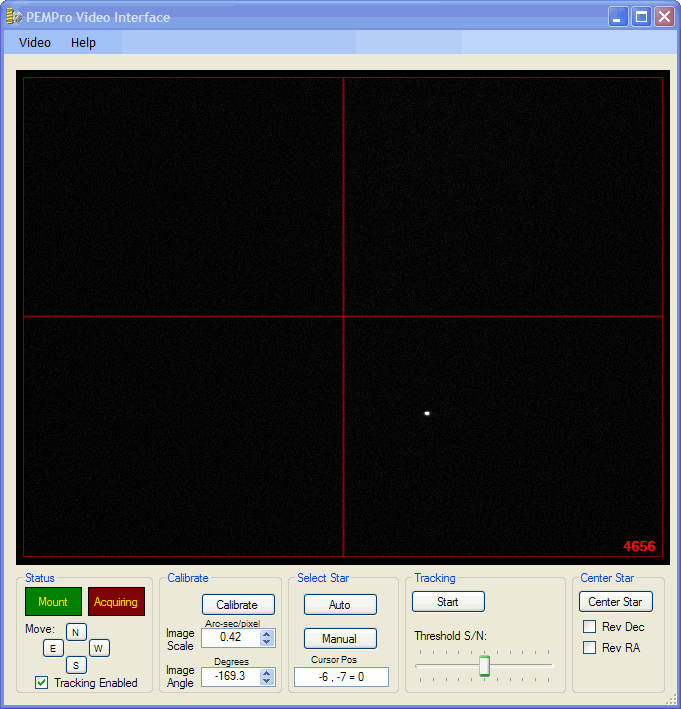
This will bring up the Video Interface:
The first thing you should do is setup the camera and resolution. Click Video->Setup in the menu:
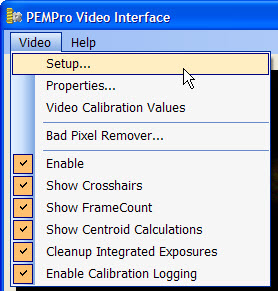
This will bring up a dialog allowing you to choose your camera , resolution, video sub-type, and target frame rate:
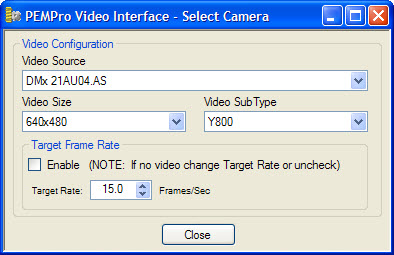
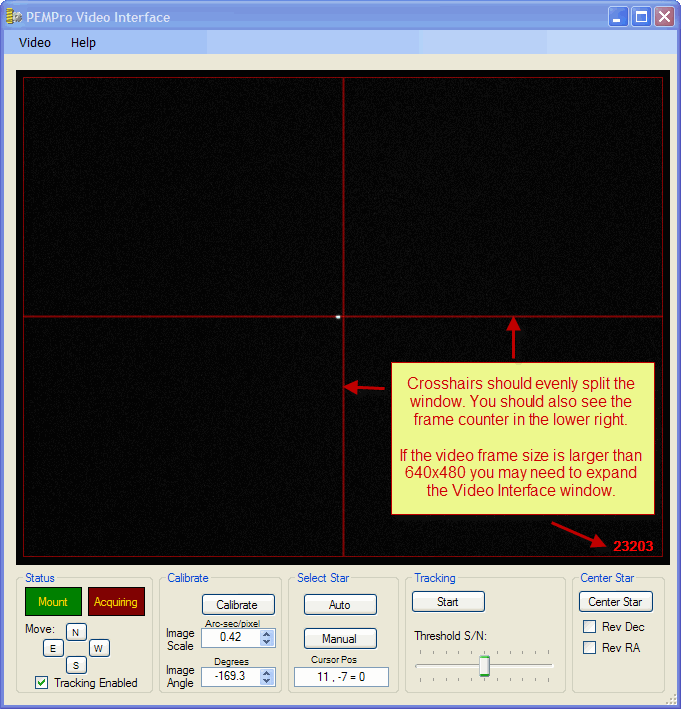
Select the desired Video Source, Video Size, and Video Sub Type. If you cannot see any video output first try unchecking Enable in the Target Frame Rate group box. If that doesn't work try changing the Video SubType. It is important that you can see the video crosshairs and frame counter (in lower right). If you cannot see them make sure that these options are enabled back in the Video menu of the PEMPro Video Interface form. If they are enabled but the crosshairs do not equally split the screen then try changing the Video Sub Type or Video Size.
The Mount box will turn green when you connect the mount. At that time the Move buttons will become active.
Here is an example of a normal working display:
Calibration
Center a reasonably bright star and click Start. A dialog will pop up that will allow you to adjust Calibration parameters:
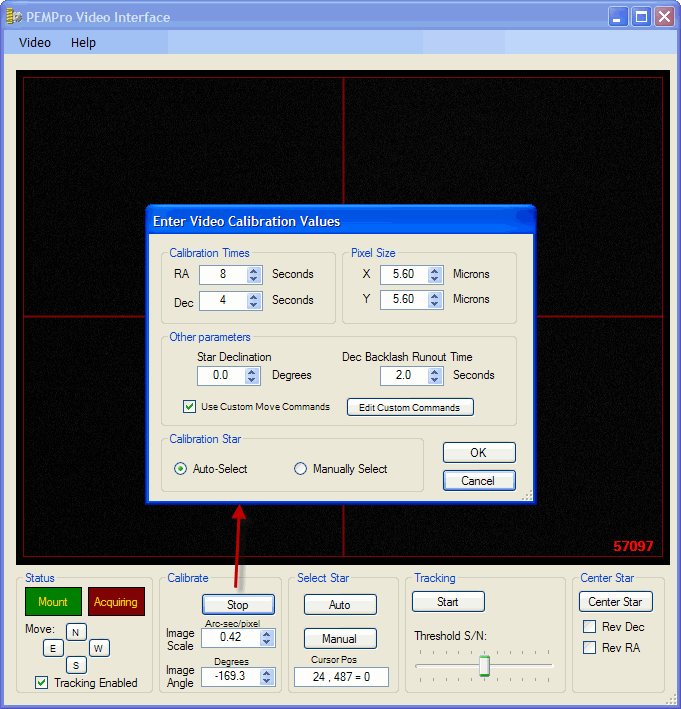
In the Enter Video Calibration Values window:
•Calibration Times - this controls the duration of the RA and Dec movements. The RA movement is accomplished by turning off tracking. You can increase the accuracy of the calculations done in this step by increasing the calibration times. However, if the star goes off of the camera then the results will not be accurate.
•Pixel Size - Used to calculate focal length.
•Other Parameters
The Star Declination will be retrieved from the mount if it is connected and is a supported function by the telescope driver. If not you can edit it here. It is important to set the declination correctly because the calculated image scale and thus apparent periodic error curve will change with declination. An accurate declination value will allow PEMPro to compensate for this.
The Dec Backlash Runout Time specifies the amount of time the mount will be moved in the declination axis before measurement starts. This allows for any backlash to be removed before measurements start.
Use Custom Move Commands allows you to specify native commands that will be passed through to the mount to stop, start, and move east/west/north/south during the calibration. This option only applies to mounts that have an ASCOM driver (for instance, it won't work with a Software Bisque Paramount ME or MX mount, since they don't have an ASCOM driver).
•Calibration Star - If you select Auto-select, the default, the brightest star will automatically be selected. If more than one star is available you may want to select a star that you know won't "fall off" the edge of the CCD. To do that select "Manually Select".
Click OK to continue with the calibration, or, Cancel to abort the calibration.
If you selected Manually Select a star when you close the dialog you will see a small dialog in the upper right:
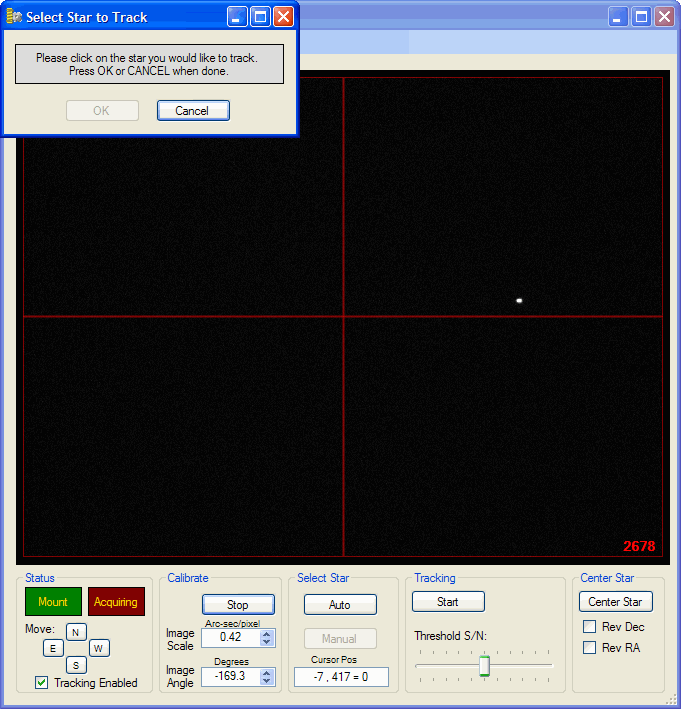
When you click a star the tracking box will appear and in the lower left you will see some tracking information (X/Y Centroid, background and average star level).
![]()
Click OK to start the calibration, or Cancel to abort.
If you clicked OK the star will track first in RA, then in Dec for the dec rounout time, pause briefly, then continue. The calibration results will then display:
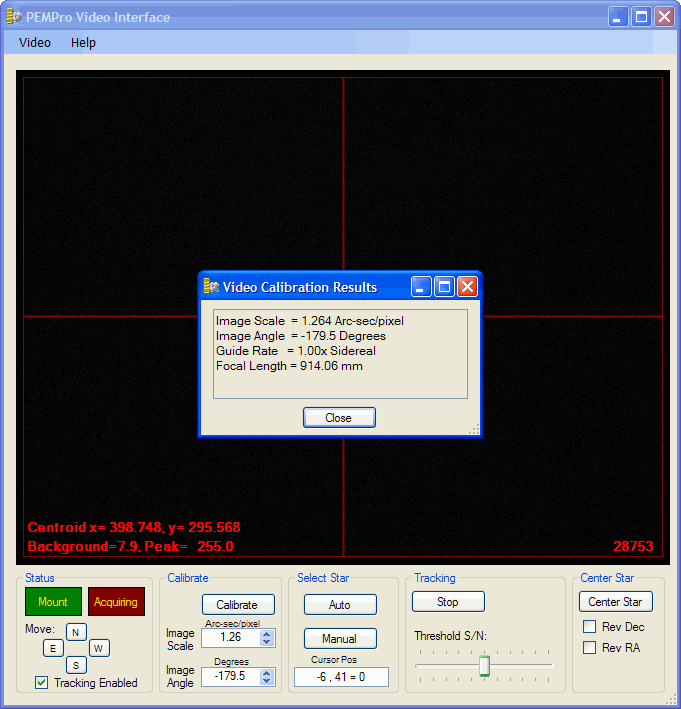
Ready to Aquire PEC Data!
At this point you can go back to PEMPro and Acquire Data. You can also do polar alignment and backlash functions and use the Star Finder feature. If you find that the tracking rectangle is not following the star very well try adjusting the Threshold S/N (Signal/Noise) control. This adjusts the level above the average background sky at which pixels are used for the star's centroid location.
IMPORTANT: If your camera is an 8-bit camera please make sure to set the min/max brightness in PEMPro's setup tab to 0/256.
Center Star Feature
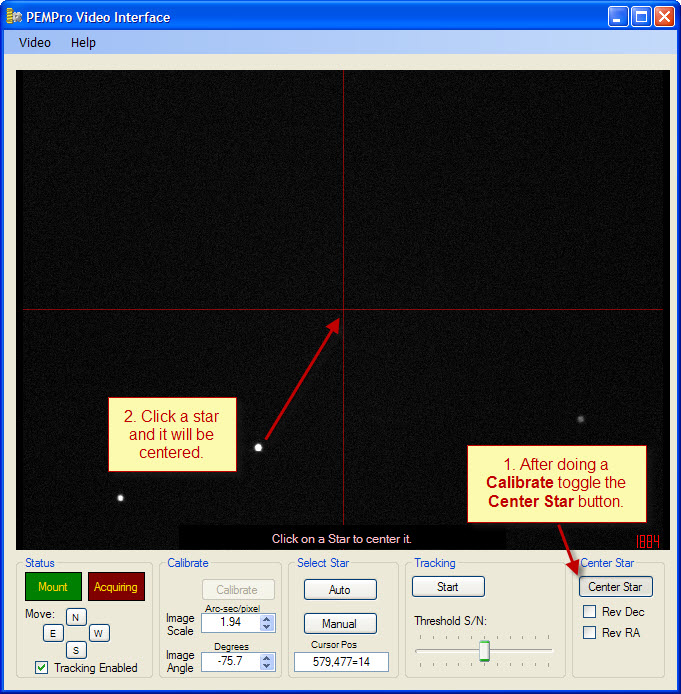
After you perform a calibration PEMPro knows the image scale and camera orientation. You can use the Center Star feature to center and star (or point on the video display). The accuracy of the centering depends on the precision of the mount's RA/Dec slew and the accuracy of the calibration you just did.
To use the feature simply toggle the Center Star button. While it is depressed the Calibrate feature is disabled and if you click on a spot on the video display (such as a star) it will be approximately centered. When you are done click Center Star again and the mode will be disabled. If you find that the star is not centering properly and you sure you calibrated correctly, try checking the Rev Dec if the dec movement is wrong, or Rev RA if the RA movement is wrong. By "wrong" I mean that instead of centering the star PEMPro moves the star further away from the center.
If a star isn't centered well enough after a centering action try clicking it again. Note that after a slew there may be some backlash in the telescope's RA axis that needs to be run out, so you may need to wait for the backlash to be taken up before the star reaches its final position.
Bad Pixel Remover
The Video Interface allows you to select bad pixels. When selected the bad pixels are replaced with the average of surrounding pixels. This can prevent false slection of a "star" that really is a bright bad pixel.
![]()
Alternatively you can use the Take Dark button to take a simple one frame "dark", which will be subtracted from the image. Usually contrast of stars is increased dramatically. You don't actually need to cover the camera, just move the telescope to an area of the sky with no stars and click Take Dark.
The following two images shows the effect of this dark subtract feature:
WITHOUT Dark Subtraction (a few hot pixels are circles) :
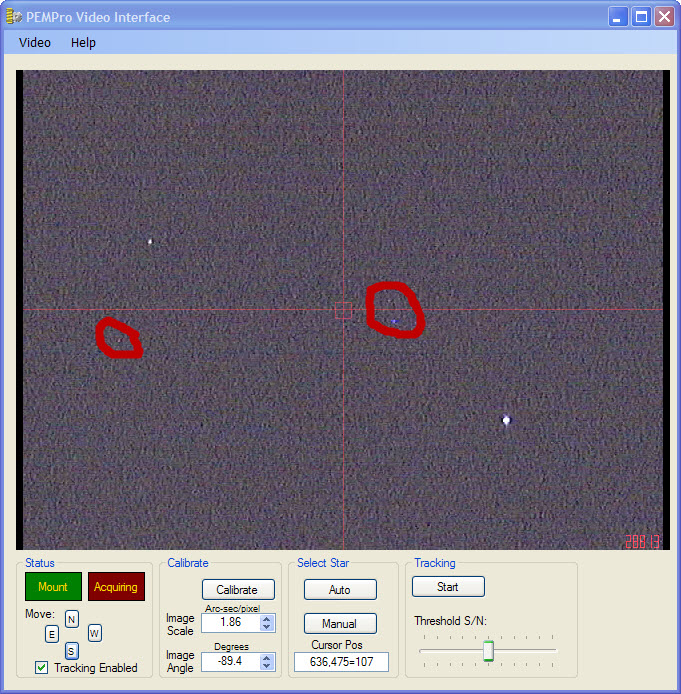
WITH Dark Subtraction (note the hot pixels are gone):
